It can become tedious when you try to send individual messages to all or a large number of subscribers or users on your Facebook page.
Sending the messages at once will understandably speed up the process, which is why questions such as this article’s topic are one of the most common.
As a marketer, you are more likely to be burdened with this issue because you want to reach more people and boost your business in the shortest timeframe.
You can send bulk messages to 20 recipients at a time on Facebook. Sending messages to 20 people at once ensure you can be more efficient and manage time effectively. However, what if you can send to all at once? This blog will introduce you to a free tool that, instead of sending to 20 at once, you can send to all with a push of a button.
Nevertheless, this blog will also show you how to send bulk messages to a maximum of 20 Facebook users per time. The process is similar to sending the message individually.
Steps to Sending Bulk Messages to Facebook Users
Step One: Sign in to your account andNavigate to the left of your Facebook homepage. Click Messages on this tab and click the New Message button close to the page’s top right corner.
Step Two: When typing a friend or subscriber’s name, click the ‘To’ box. Select the name immediately it appears to add it to your list. Continue typing the names of the other recipients until the list is complete.
If you want to send messages to non-Facebook users, enter their email addresses in the ‘To’ box.
Step Three: Type your message in the text box that follows and click ‘Send’ to confirm.
By following these three steps, you will send bulk messages to your friends and subscribers on Facebook.
However, you will agree that even this method can be burdensome. What if there are new subscribers or friends that you do not know their name? What if there are hundreds or thousands of subscribers you want to send bulk messages to on Facebook?
Many questions need answering, and although this method can ease things a little bit, there are still a couple of limitations.
This problem has been eliminated by a free marketing tool – Zebrabuzz. This tool can collect your friends or subscribers’ email address and phone number and send bulk messages on Facebook.
You can read our blog on how to collect email address or leads inside Facebook messenger with Zebrabuzz to learn more about that.
It can also collect subscribers’ names, so you do not have to type in their names when you want to send the bulk message.
There is no special process for collecting their names. As soon as a user likes your page, they have become a subscriber, and you can send them bulk messages on Facebook.
However, you would have to collect their email address and phone number to send them messages outside of Facebook.
With Zebrabuzz, you will be able to send bulk messages to as many of your subscribers as possible at a go. It also offers targeting options, suppose you want to send bulk messages to your Facebook friends based on their gender, time zone, and location.
How to Send Bulk Messages on Facebook Using Zebrabuzz
Step 1: To get started, log in to your Zebrabuzz dashboard. If you have not linked your Facebook page to your Zebrabuzz account, click on ‘Import Account’ at the top of the page and follow the easy steps that will be displayed.
Step 2: To create your bulk message for Facebook Messenger, click on Broadcasting on your dashboard’s left menu.
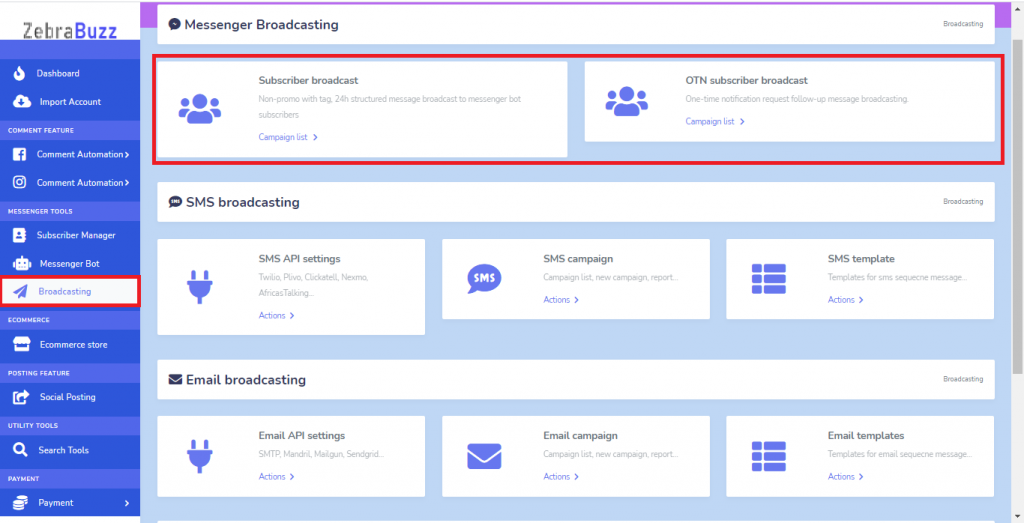
A new interface will be displayed. There are headings named Messenger Broadcasting, SMS Broadcasting, Email Broadcasting, and SMS/Email Sequence Campaigner for external contacts.
As stated before, besides Facebook Messenger, you can also use Zebrabuzz to send bulk messages to your subscribers via their emails or SMS. Click ‘Campaign List’ under Subscriber Broadcast to continue.
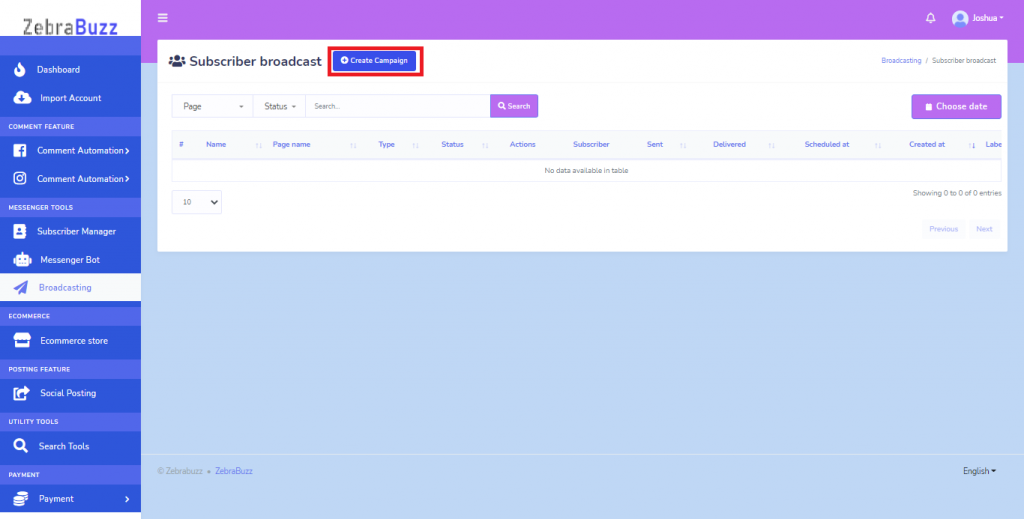
Step 3: On the new interface, click on Create Campaign at the top of the screen.
A new interface titled Add Subscriber Broadcast
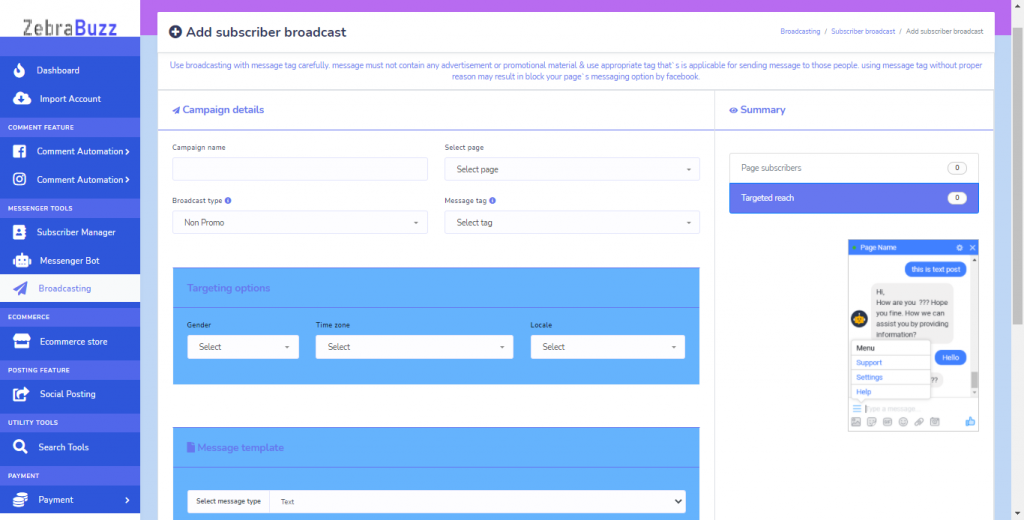
You will see different boxes on this interface that you will fill to create bulk messages for your subscribers. The campaign name is so you can identify each bulk message campaign you create.
You will also select the page, especially if you have more than one Facebook page imported into your Zebrabuzz account.
Step 4: Next, select the type of broadcast or bulk message you want to send. You can choose between a Non-Promo broadcast and 24hour Promo.
Next is to select the message tag. Ensure the bulk messages you send to your Facebook Messenger contacts are in tandem with whichever tag you select.
Step 5: Suppose you want to target a specific group of subscribers, Zebrabuzz also offers you targeting options. These options include Gender, Time Zone and Locale.
Step 6: Now, move to the Message Template part. You can select the type of message you want to send here.
For text, all you need do is provide the message. For image, audio, video, gif and file, you will have to upload from your local drive. Uploading is optional for Generic Template and carousel.
For Quick reply and Text with Buttons, you can provide a message text which is usually an instruction to click the buttons you have created.
Zebrabuzz allows you to mention the name of each subscriber in each message. You can use this to give a personal touch to your customers. It is used to give the customer the impression that the message was constructed for them only.
All you need to do is click the First Name or Last Name option, and for every bulk message that is sent, the first name or last name of each user will be there to personalise each message. You can also choose both first and last name.
Step 7: By toggling the Sending Time radio, you will choose when you want the bulk message to be sent.
Step 8: Confirm the operation by clicking Create Campaign.
You can create as many different bulk message campaigns as possible and have it run for as long as you want without supervision. Your Zebrabuzz tool will continually send the bulk messages to your Facebook subscribers without interruption.


