Zebrabuzz is a web marketing tool with several features that can be used to market your products for you.
One of its features is an ‘e-commerce in Messenger chatbot’ that can engage your customers and sell your products and services directly to your customers on Facebook Messenger and other platforms.
Besides this highly intelligent chatbot, Zebrabuzz also has another feature that helps you market your products to new and existing customers. This means that you have a marketing tool that can take your products to your customers and another that helps you sell them.
One of the features that market your products is called ‘Social Poster.’ Zebrabuzz’s social poster feature is capable of posting your products and services on as many platforms as possible.
This feature is divided into two categories – Facebook Poster and Combo Poster. The Facebook Poster, like its name, can only post your products on Facebook.
The Combo Poster, on the other hand, can post to several social media platforms, Facebook inclusive.
If Facebook is the only platform you use to market your business, then you can use the Facebook poster. However, if you use more than one social media platform to do your business marketing, then you should use the Combo Poster.
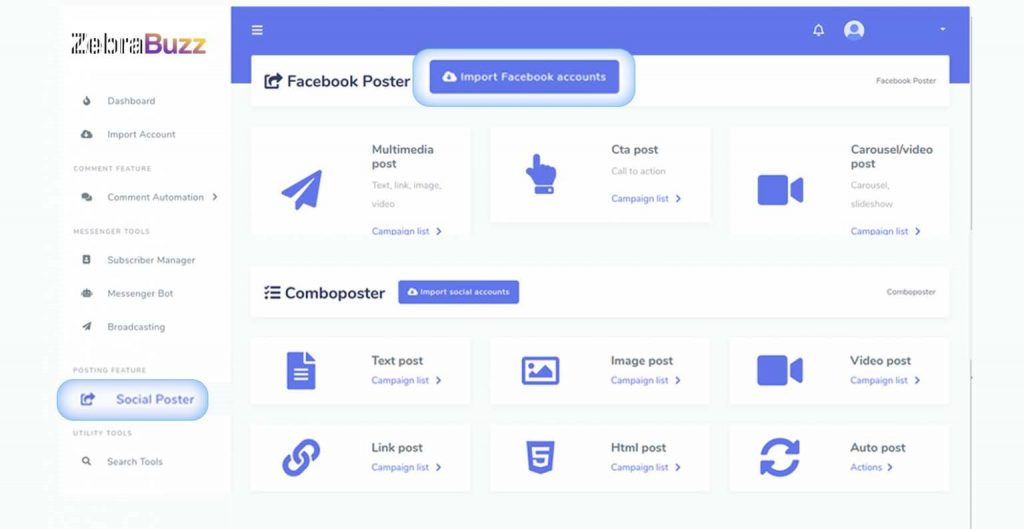
If you choose the Facebook Poster, you will be able to make multimedia, CTA and carousel/video posts regularly. Multimedia posts include texts, link, images and video.
CTA means ‘Call To Action’, and it is also available in this category while with the carousel/video post, you will be able to make carousel and video posts.
Combo Poster can make text, link, image, video, HTML and auto post to several social media platforms like Facebook, LinkedIn, Pinterest, Twitter, WordPress, and Blogger.
How to Use Zebrabuzz’s Social Poster Feature
The Social Poster Menu is at the left-hand side of your Zebrabuzz dashboard. When you click on it, a divided page will appear. At the top is the Facebook Poster while the Combo Poster is below.
Facebook Poster
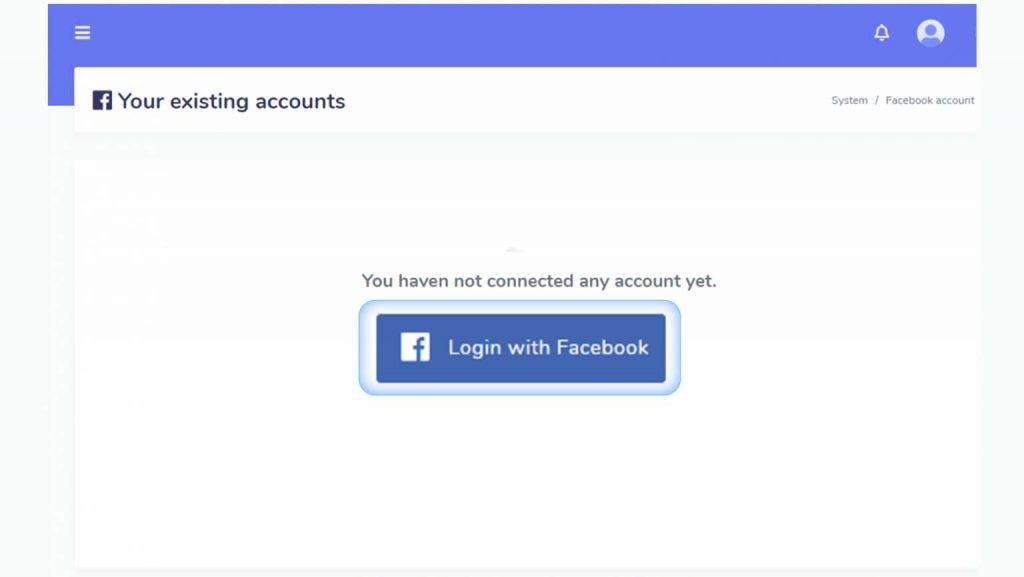
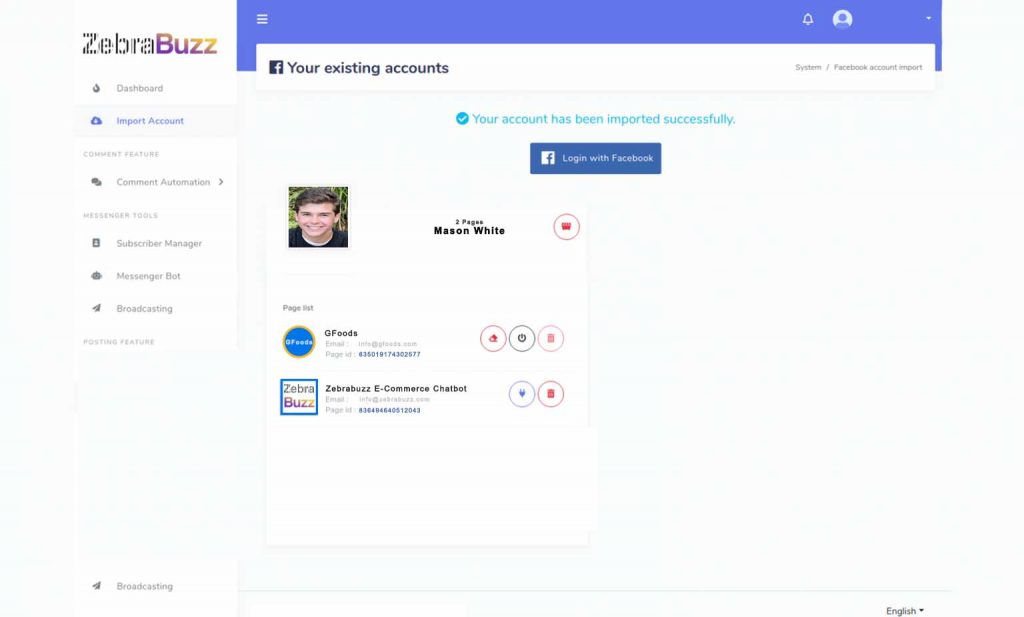
To use the Facebook Poster, the first thing to do is to integrate a Facebook account with at least a page. To integrate a Facebook account, click ‘Import Facebook accounts.’
A page labelled ‘Your existing accounts’ will pop up and from here; you will be able to integrate an account or more. To integrate an account, you must be logged into it; therefore, you will click on ‘Login with Facebook’ at the centre of the page.
Afterwards, a page with two buttons labelled ‘Cancel’ and ‘Continue as [Facebook account name]’ appears. By clicking on the ‘Continue as [Facebook account name]’ button, your Facebook account will be successfully integrated alongside all the pages on it.

All the pages on the account will appear in a list, and you can choose to delete any of the pages by clicking ‘Delete’.
To post on the pages, you must allow bot connection by clicking ‘Enable bot connection’ which is beside the page.
Therefore, your Facebook account has been integrated and bot connection enabled for all your pages.
It is possible to integrate as many Facebook accounts as possible as well as enabling bot connection for several pages. You can as well delete the accounts and pages if you want to.
As soon as these are done, go back to the Social Poster interface by clicking on Social Poster at the left-hand side of the dashboard.
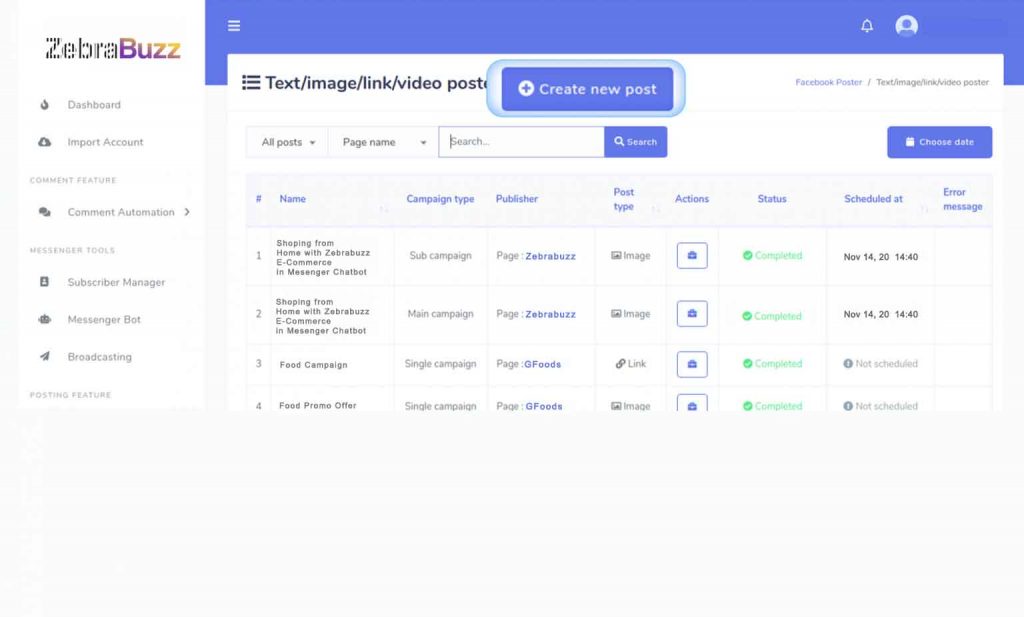
To create any multimedia campaign, click ‘Campaign List’ which is below ‘Multimedia Post’ in the Facebook Poster menu.
A page will immediately pop up, and you can click the ‘Create New Post’ at the top of the page to create a campaign. Fill the form that follows and select the type of post at the top of the page from options like Text, Link, Image and Video.
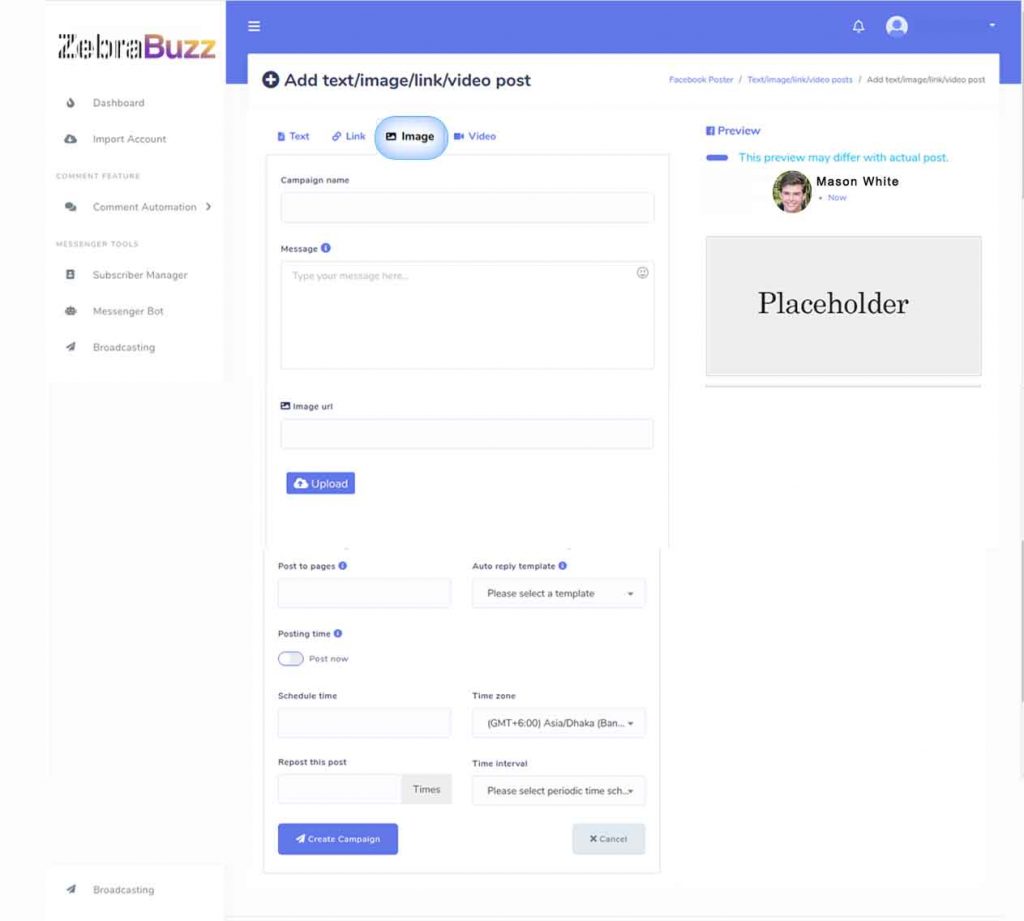
To create an image post, for example, click ‘Image’ then write the name of the campaign in the labelled box. The caption that will go with the image should be written in the box labelled ‘Message.’
You will then upload the desired image from your device and select at least a Facebook page in the ‘Post to Pages’ option.
There is a radio button labelled ‘Posting Time;’ when you select the ‘Post Now’, the post will be made immediately. However, if you want the post to be made repeatedly at intervals, deselect it.
Afterwards, a pop up of four boxes will appear. They include ‘Schedule Time,’ ‘Repost this Post’, ‘Time Zone,’ and ‘Time Interval.’
From the Schedule Time, a drop-down calendar appears where you can set the date you want the post to be made. The ‘Repost this Post’ tab allows you to choose the number of times you want the post to be made.
The time interval allows you to select the number of times it will go live. You can select ‘Every Hour,’ which makes the post hourly or ‘Every Six Months,’ which will repost once every six months.
Click on the ‘Create Campaign’ button to confirm the operation. Henceforth, Zebrabuzz’s Social Poster feature will do the job of posting without any supervision from you.
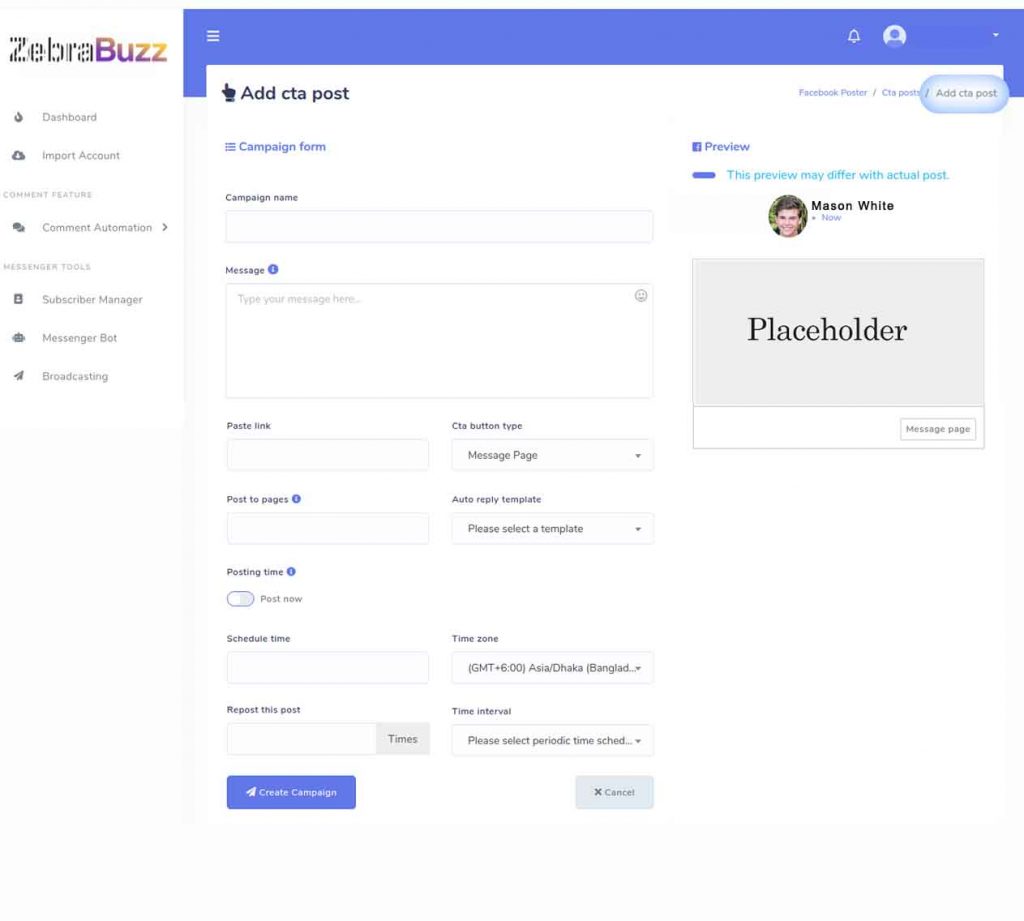
Go through the same process for text, links, and video. To make CTA post on your Facebook pages, select the ‘Campaign List’ button under ‘CTA Post’, and another page called CTA Poster will appear.
Click on ‘Create New Post’ and a form labelled ‘Add CTA Post’ will appear. Use the same procedure as before and write the Campaign Name and caption in the appropriate boxes.
Next, use the ‘Paste Link’ box to paste a link. Next, choose a CTA button type from its box and follow the procedures as before.
Combo Poster
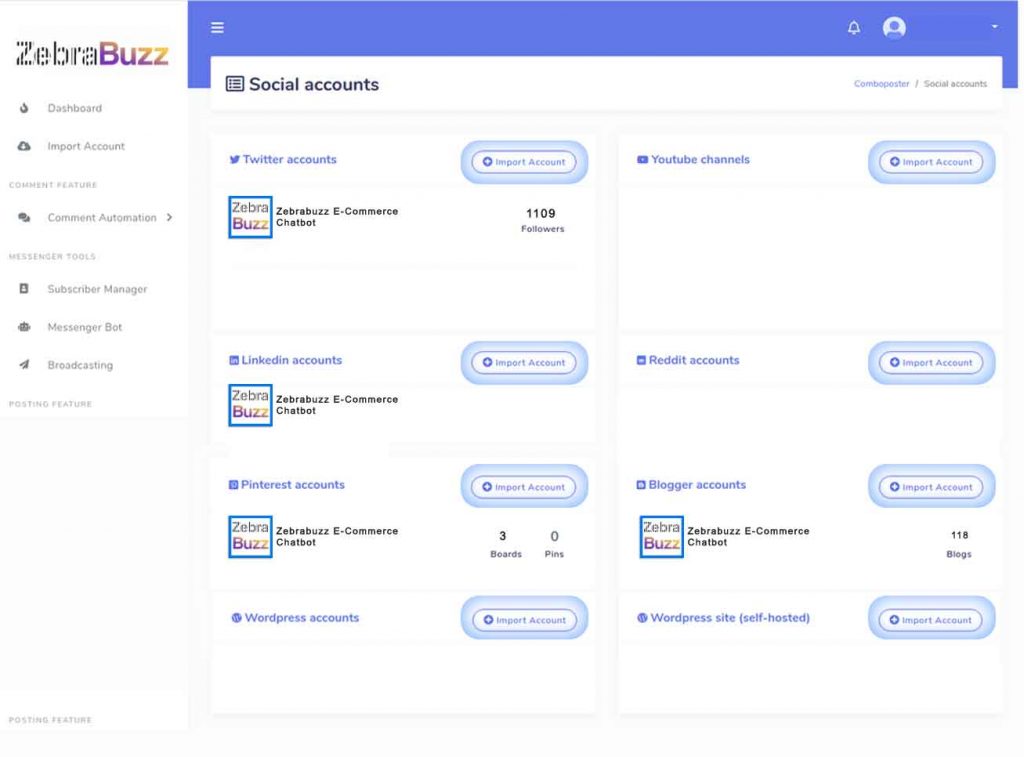
The Combo Poster is used to send your posts to different social media platforms, including Facebook. Navigate to the Combo Poster part and click ‘Import Social Accounts.’
A fresh page labelled ‘Social Accounts’ will appear, and you can import several accounts on this page. You can import your Twitter account as well as YouTube channels, Reddit account, LinkedIn, Pinterest, WordPress, Blogger account and your self-hosted WordPress site account.
How to Use Combo Poster
The Combo Poster can make text, image, link, video, and HTML posts to several social media handles.
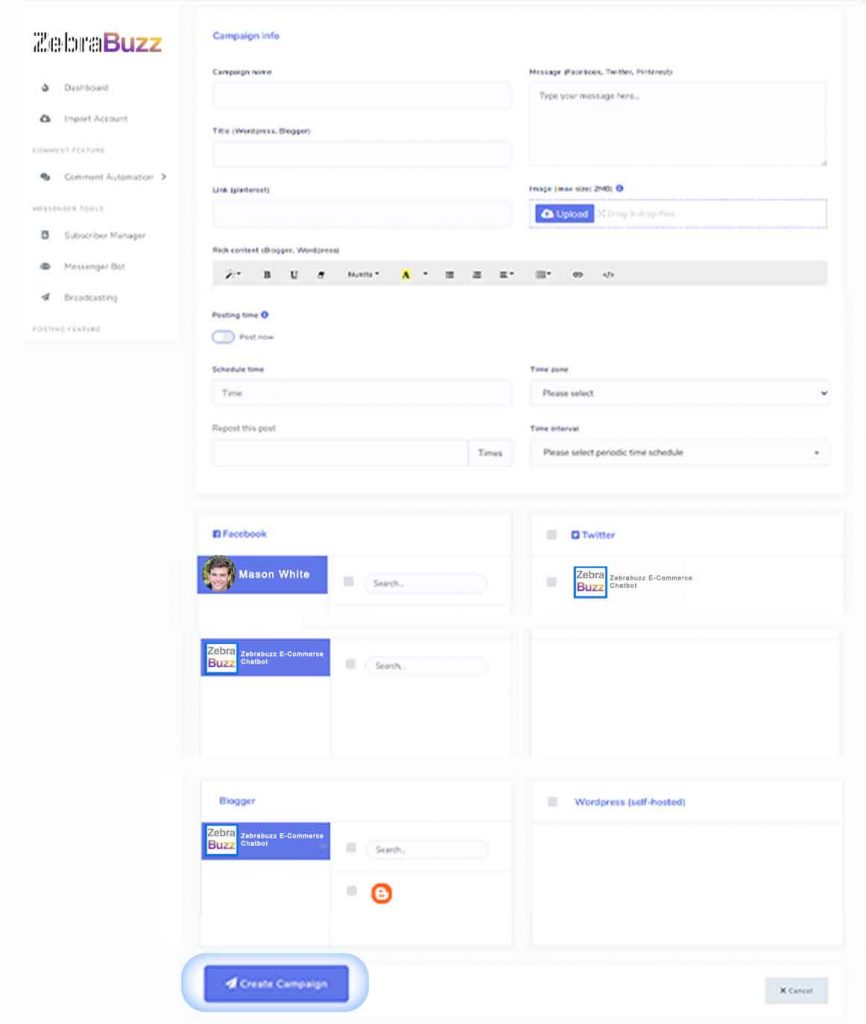
To make an image post, for example, click the ‘Campaign List’ below the ‘Image Post’ button and a form labelled ‘Campaign Info’ pops up. Fill the form with the appropriate details.
For WordPress and Bloggers, write a title and write a message for others like Facebook, Twitter, and Pinterest.
Next, upload an image and write content for the post that will be made on Blogger and WordPress. The next step is to select the social media accounts you will like to post on.
Click on ‘Create Campaign’ to confirm the operation.
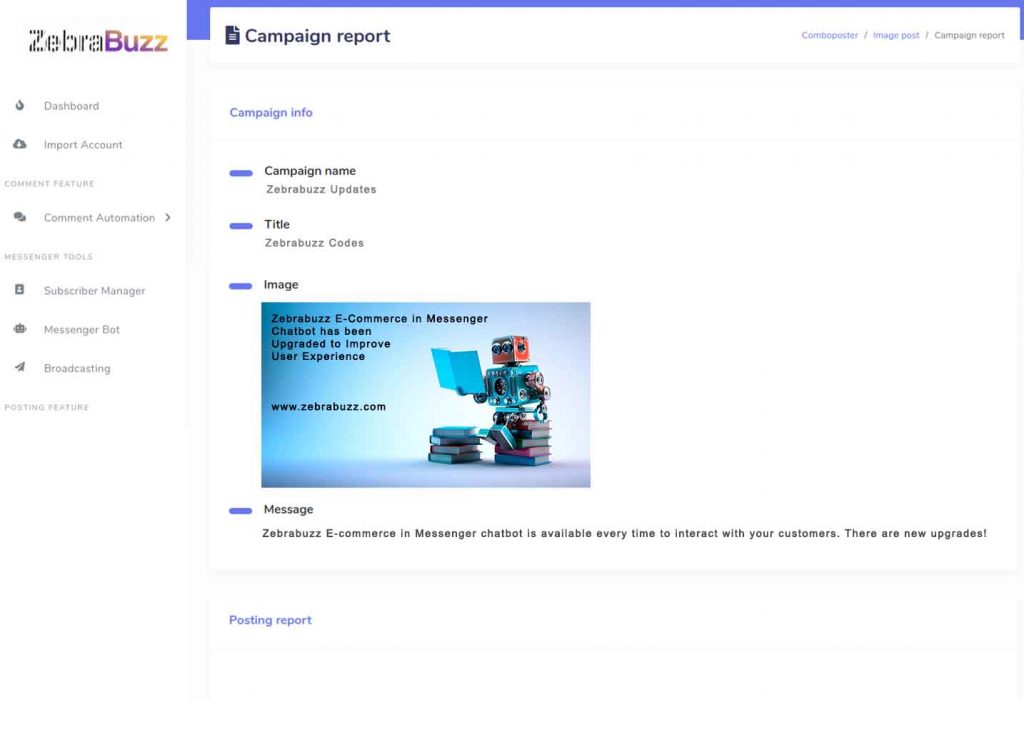
After confirmation, a page appears that shows you all your campaigns with their details. You can also delete any campaign of your choice from here.
To see the campaign’s report, click the eye icon beside it. A report labelled ‘Report of Reposting Campaign’ appears and from here, you can find the main campaign as well as a list of sub-campaigns and other details.
Click on the eye icon beside the main campaign, and you will find the campaign’s report.
If a campaign is still pending, you will not be able to see any data on it.
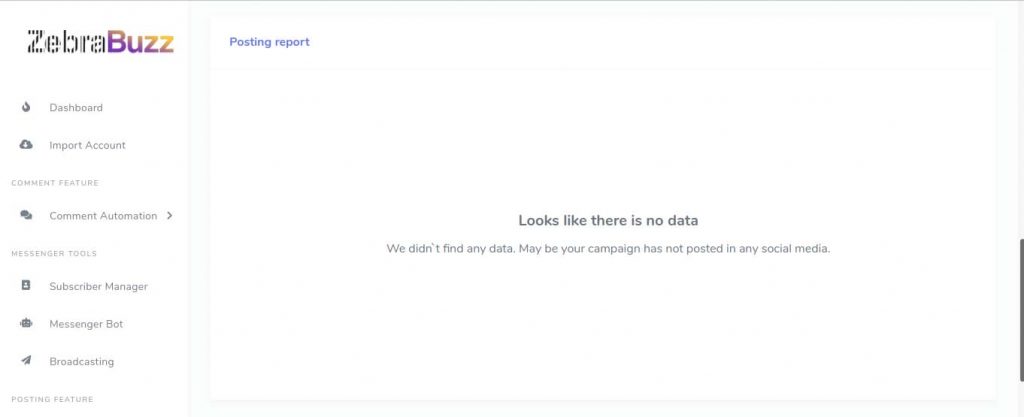
A campaign that has already been completed will bring out the Posting report of the campaign from the different social media platforms it was on.
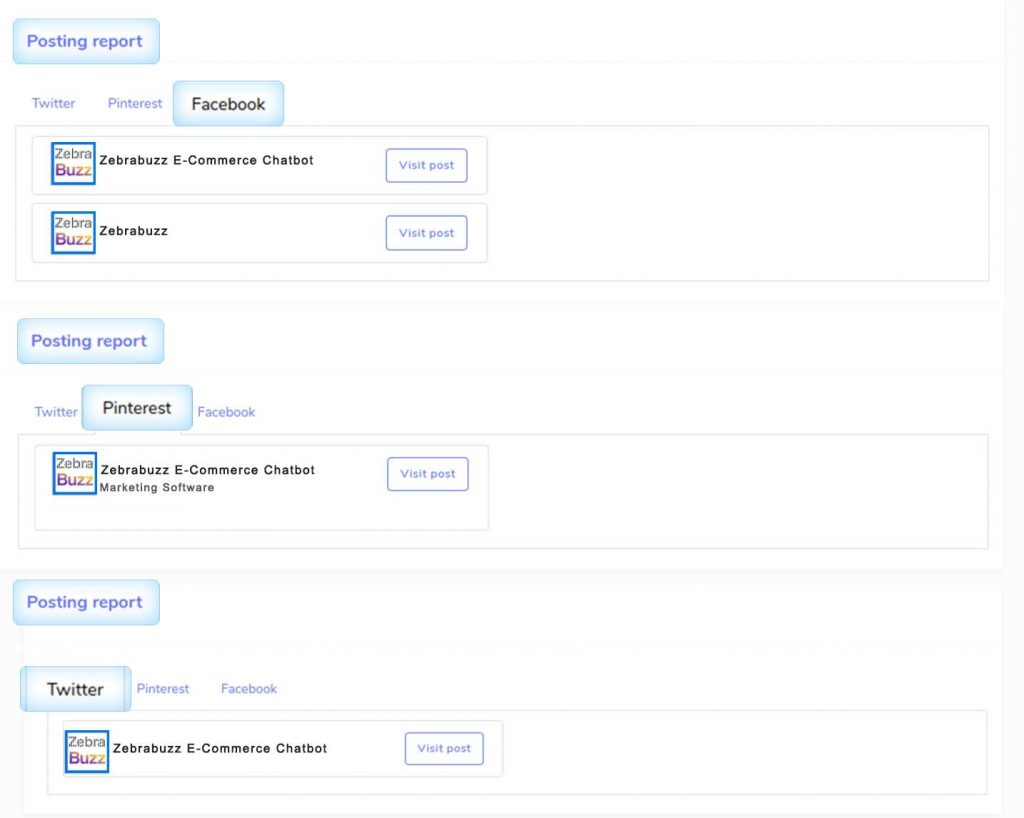
Also, if a campaign has not been posted, an error report will come up.
If you follow these steps, you will be able to successfully use the Zebrabuzz Social Poster feature to make posts to your social media platforms without your supervision. You can then proceed to focus on other things as this feature helps you market your products.