The Zebrabuzz e-commerce in Messenger chatbot is a unique program that can sell products to your customers through Facebook Messenger. This feature of Zebrabuzz can also multitask, meaning it can attend to as many customers as possible per time.
Asides selling your products, Zebrabuzz can perform many other functions like advertising and marketing your products across various social media platforms.
This blog is aimed at showing how e-commerce in Messenger chatbot works in general as well as special features of the Zebrabuzz Facebook Messenger.
The e-commerce in Messenger bot starts working after you have created and set up your virtual store.
As soon as a customer hits the ‘Send Message’ button on your Facebook page, a chat window will immediately come up. First-time customers will, however, have to click on the button labelled ‘Get Started’ at the lower part of the chat window.
Returning customers will click on the menu in the chat window, which will bring a drop-down menu where they can find the ‘Start Shopping’ button.
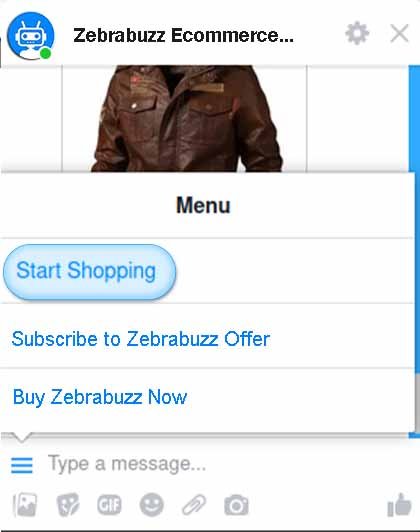
After the customer clicks the ‘Start shopping’ or ‘Get Started’ buttons depending on the kind of customer, the e-commerce in Messenger chatbot immediately sends the greeting message you wrote when setting up your chatbot.
The buttons you have created before this time will also be displayed. For the sake of this blog, we will use our own buttons to show how this works. Do know that your buttons may differ from ours.
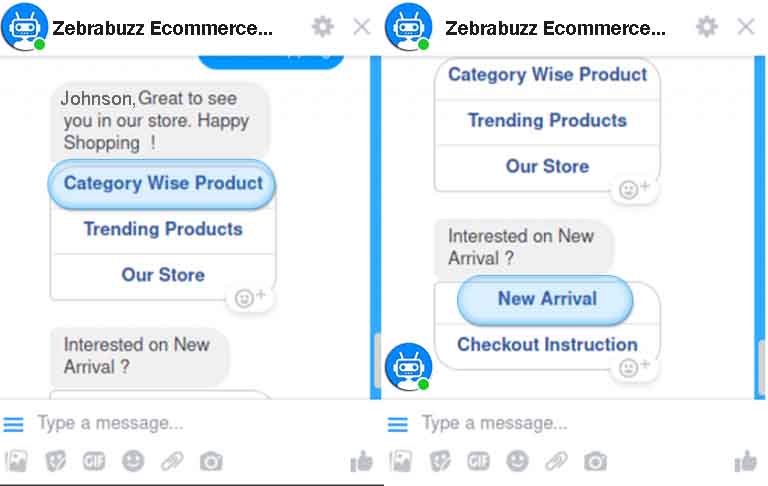
Once the customer clicks on ‘New Arrivals’ for example, the products under this button will be displayed. Your customers will have the chance to view each product one after the other.
There are ‘Greater Than’ sign and ‘Less Than’ signs on the right and left of each product respectively, which will be used to navigate through your products listings.
There is a webview button labelled ‘Our Store’ which can be anything on yours; when a customer clicks on it, another window, different from the chat window appears which will display the entire store.
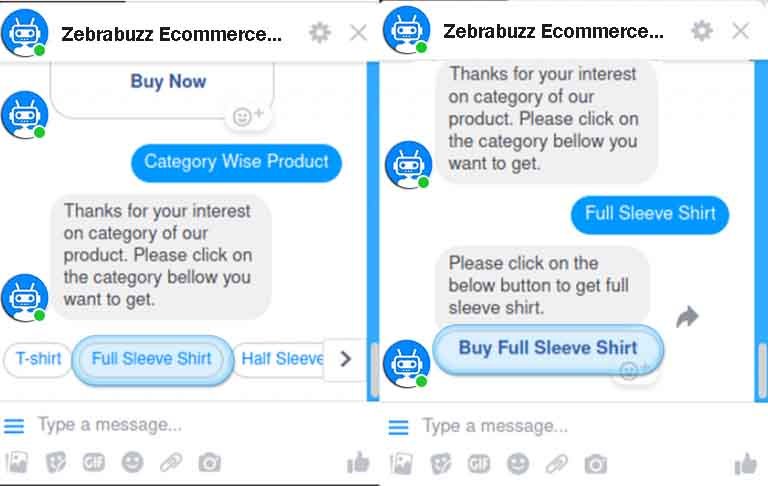
The ‘Category Wise Products’ when clicked will display a range of different product categories which you will be able to see inside the chat window.
A category when clicked will lead to another category button which will also have a greeting message at the top. When the customer clicks on the new category button, it will display all products in the category in another wider window.
The e-commerce in Messenger chatbot will label every product with a ‘Buy Now’ button which when clicked will open another window outside the current chat window. This window will have the name of your Facebook Page, your store’s logo, and the image of the product on it.

Markers like ‘25% off’ and the likes are usually an indication that the product is up for sale. Below the item for sale, customers will be able to see buttons like ‘Remove -1’ as well as ‘Add +1’. This means the customers can add more than one unit of the product should they want two or more. The customer can also remove if the items are too much.
In-between these two buttons, there is a space that displays the quantity of the product the customer has added to their cart. The e-commerce in Messenger chatbot also works such that after adding at least a product to the cart, customers can visit their cart to checkout using the ‘Visit Cart’.
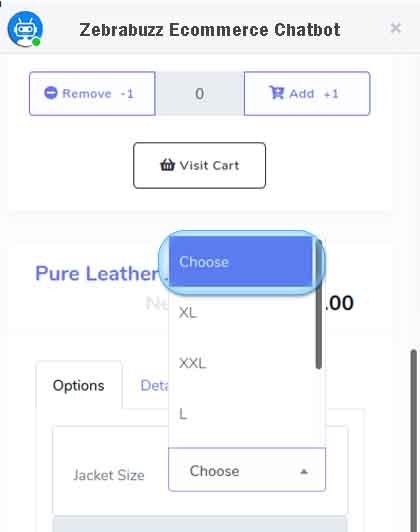
Subsequently, the customer will be able to see product names and prices. Below the product name and price, three buttons are displayed. These are the ‘Options’ button, ‘Note’ button, and ‘Details’ button.
The ‘Options’ button, when selected, will allow customers to see more details and attributes of product attributes like colour, size, length etc. Customers will also be able to find the product type, e.g. sleeveless shirts, gowns, skirts, t-shirts etc.
There is also a button that will allow your customers to visit your entire shop when clicked. The ‘Visit Shop’ button will open your whole shop in a window.
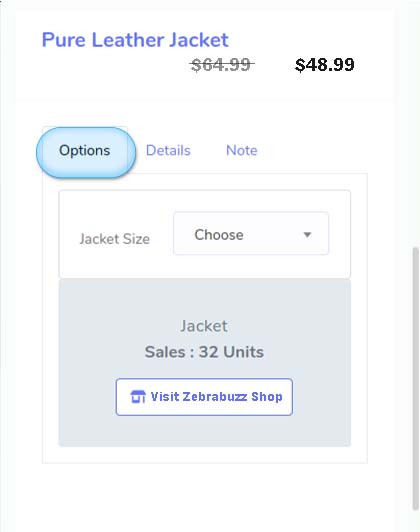
In this window, you will also find another button called ‘Our Shop’, which has three more buttons below your store’s logo. These are ‘Search’, ‘Short’, and ‘Category’ as well as a Cart symbol.
The ‘Category’ and ‘Short’ buttons will allow customers to select any category of product they want. Each product has the name of the product and the total number of the product that has been sold as well as the category it falls under and its price.
Clicking on the ‘Choose option’ button will lead the customer to the exact product your shop has to offer. When the customer clicks on the ‘Details’ button, more information and description of the product will appear. If there are extra details, ‘Note’ button will reveal this.
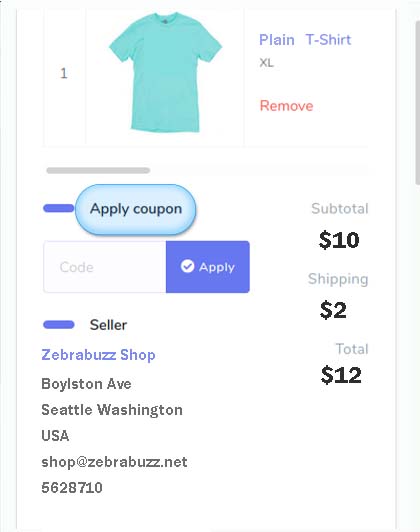
The ‘Visit Cart’ button will take customers to their cart. Their cart will display all the products they have added over time as they shop.
There is also the option for customers to ‘Add Coupon’. If the product has a coupon attached to it, the customer will be able to enter the coupon code and send with the ‘Apply’ button.
There is also the price of the button included, the shipping and total cost. Contact details like shop address, phone number, and email of the shop’s owner are also displayed.
By providing the ‘Billing Address’ and ‘Delivery Address’, the customer agrees to buy the product. Clicking ‘Save and Proceed to Checkout’ will take the customer to the payment page.
The payment page will have several payment options that have been integrated, which include PayPal and the likes.
You can also pay with a card, pay on delivery or pay manually which a customer can choose from. If the customer will like to choose a payment option separate from payment on delivery, the total amount will be paid to you.
However, the pay on delivery option will display an invoice with a pending payment status. It is possible to see the invoice on a different window.
The customer’s order history will be forwarded as chat to the chat window under a button labelled ‘My Orders’. A link to their order history will also be sent to their email.
Manual payment means the amount will be sent to your bank account. The button called ‘Manual Payment Instruction, ‘ which is under the ‘Pay Manually’ button holds the bank account information.
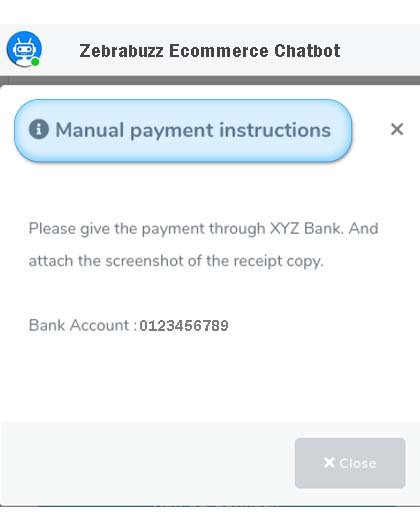
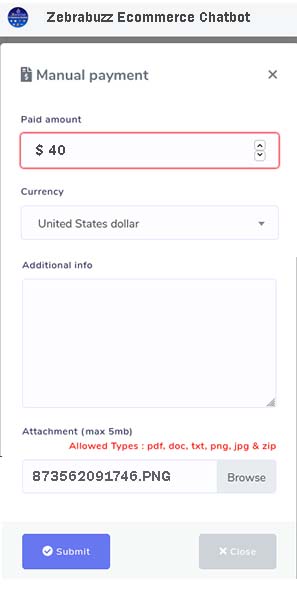
After clicking on the ‘Pay Manually’ button, a form will appear where they will also have to attach a screenshot of the payment receipt. Clicking ‘Submit’ will confirm the purchase.
The e-commerce in Messenger chatbot will now send a confirmation message with the details of the transaction to the customer. A link will be displayed where the customer can see the summary of the order.
Afterwards, you will be able to see the order which has been placed on your E-commerce in Messenger chatbot dashboard. You can now proceed to deliver the products to your customers.
Just like that, the Zebrabuzz e-commerce in Messenger chatbot has sold your product for you without any help from you. All these could be done while you sleep or are busy with another commitment. All you need do is deliver the products to your customers.