One of the many features that Zebrabuzz offers is the e-commerce store which makes your online business easier. However, to completely set up your store, you will also need to set up the e-commerce payment settings.
It is easy to do, and by following the steps that will be carefully highlighted below, you will be able to set up e-commerce payment settings from your Zebrabuzz dashboard.
Before we start proper, here are a few things to note:
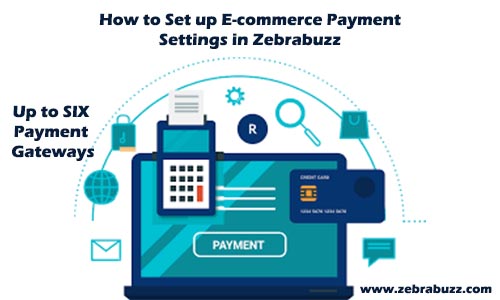
- Zebrabuzz offers several payment gateway options for your e-commerce store. This means you can choose from a variety of global payment gateways which will make payment seamless for your customers. These options include PayPal, Paystack, Razorpay, Stripe, Manual Payment, Mollie, and the option for Payment on Delivery.
- Also, payment settings are universal for each account. This means that all the stores on the same account will use the same payment settings. If you have more than one store linked to an account on Zebrabuzz, the e-commerce payment settings will be the same for all the stores.
With that being said, below are the steps to setting up your e-commerce payment settings:
Steps to Setting up E-Commerce Payment Settings in Zebrabuzz
At the left-hand panel of your Zebrabuzz dashboard, you will find the ‘E-Commerce Store’ tab. Click on it, and it will take you to the E-Commerce Store page.
On the new page, click on ‘Checkout Settings’ at the right-hand side of the screen; it is the third option from the top.
The Payment integration screen will look like this:
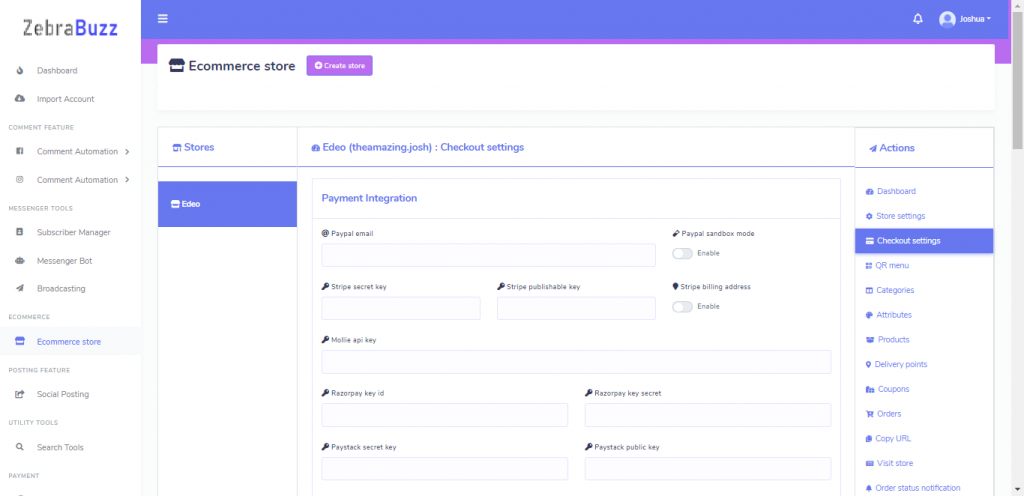

As the screen shows, there are up to six types of payment options: PayPal, Paystack, Razorpay, Stripe, Mollie, and Manual payment with the option to select cash on delivery as well.
To completely set up e-commerce payment settings in Zebrabuzz, here are the title of the options in the Payment Integration form and what they mean:
PayPal Email: This is where you provide the email to your PayPal business account.
PayPal Sandbox Mode: Enable this option if you want to test the PayPal payment system.
Stripe Secret Key: Suppose you also want to integrate a Stripe payment option, use this to add your Stripe account by providing your secret key
Stripe Published Key: This is to input your Stripe Published key.
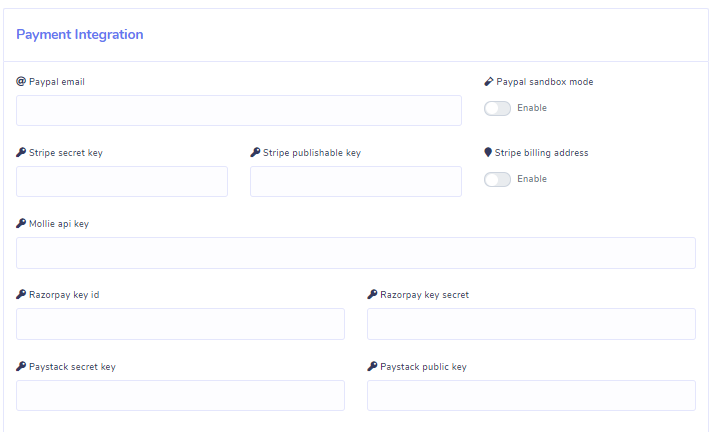
Razorpay Key ID and Razorpay Secret Key: Use this option to integrate a Razorpay payment system by inputting your key ID and secret key.
If you have a Razor account but do not know this information, go to your Razorpay dashboard, navigate to ‘SETTINGS,’ click API KEYS at the top of the page.
Your key ID and Secret will be shown here, copy and paste into their appropriate places on the Zebrabuzz payment integration form.
PayStack Secret Key and PayStack Public Key: To integrate Paystack, use this to input your secret and public keys. To find this on Paystack, navigate to ‘SETTINGS,’ API KEYS and WEBHOOKS; copy and paste the keys in their respective fields.
Mollie API Key: Follow the same process as above to integrate a Mollie account into your e-commerce payment settings.
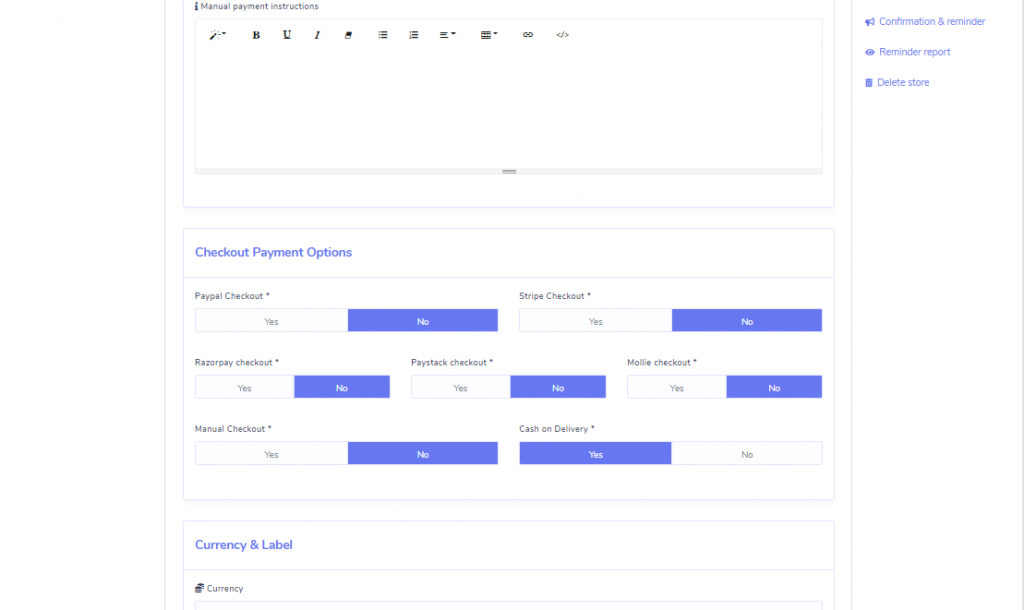
Manual Payment Option: This option is available for you to be paid manually by your customers and upload the payment documents and receipts.
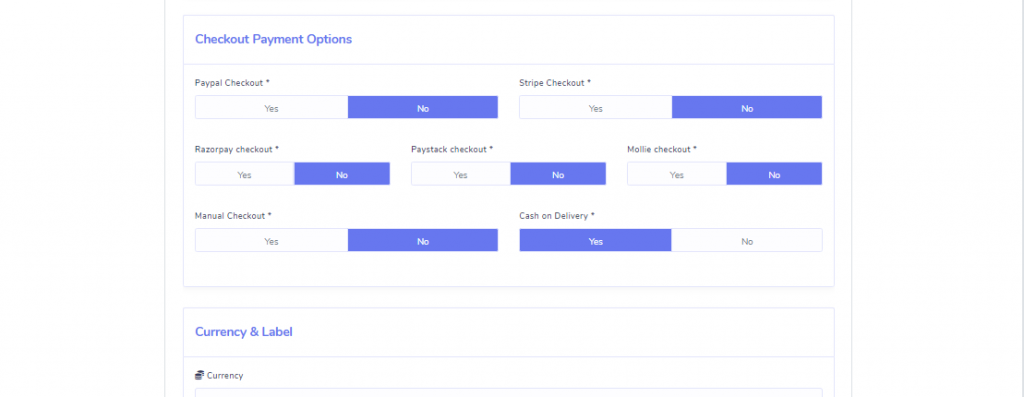
Checkout Payment Options
This is where you select the payment options you want your customers to see and be able to use when checking out.
Although you may have set up all the payment systems in the e-commerce payment settings above, you can decide not to make some available for your users.
Therefore, click ‘Yes’ for the payment options you want your customers to see when checking out and leave it as ‘No’ if you don’t want them to see a particular payment method.
Currency & Label
Currency: Use this to choose the payment currency of your country.
Currency Alignment: This is so you can edit the currency to either appear on the right or left of the amount. Enabling the Right Alignment means it will be shown on the right as 100$ (if the price is 100 Dollars). It will be $100 if the setting is disabled.
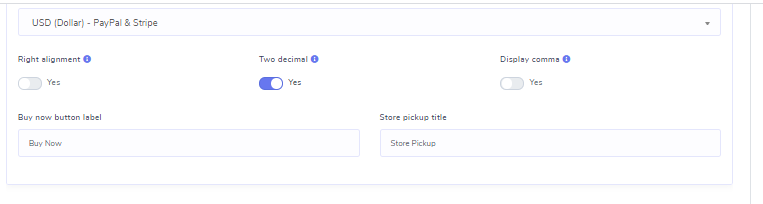
Two Decimal Places: Enabling this means the product price will be displayed with two decimal points. For instance, if a price is 99 Dollars and 99 Cents, the price will be shown as 99.99.
Comma Separated: This, when enabled, means the price will be separated with commas when displayed. For example, 2,000 or 100,000 as the case may be.
Tax and Delivery Charge
This section is to state your tax and delivery charges. Tax is in percentage.
Tax %: When selling products including tax, this is where you set the percentage of tax.

Delivery Charge: If a charge comes with delivering your product to the customers, then this is where you set the price. You can decide to keep this option empty if you are not interested in a delivery charge.